.svg "GoElite Logo")
.jpg?width=500&height=281&name=%E5%B0%81%E9%9D%A2%20(7).jpg)
Guide for change of status denials
Plan B for Change of Status Denials: Consular Processing as an Alternative
Introduction
A change of status application can be denied for a number of reasons. These include not maintaining valid status at the time of your application, not meeting eligibility requirements, violating the terms of your current status, or providing insufficient documentation.
For example, you might be experiencing an H1B layoff and want to apply for a change of status from H1B to F1. However, while adjudicating your change of status, the USCIS determines that your application lacks sufficient proof that you intend to return to your home country following your studies, thus resulting in a denial.
One option you have if your change of status application is denied involves returning to your home country, or in some cases a third country, to apply for the new visa through consular processing. In short, consular processing of a nonimmigrant visa means applying for your visa outside of the United States at a U.S. consulate.

What is Change of Status (COS)
According to the United States Immigration Service (USCIS), Change of Status allows foreign nationals holding one type of nonimmigrant status to change to another nonimmigrant status without having to leave the country.
Six Common Reasons for Change of Status Denial
A change of status application can be denied for a number of reasons, including incomplete or inaccurate forms, lack of supporting documentation, ineligibility for the requested status, failure to maintain current status, or issues such as criminal background or prior immigration violations.
1. Mistakes on Form I-539
Errors or missing information on Form I-539 can lead to a Request for Evidence (RFE) or denial of your change of status request.
2. Insufficient Documentation
Ensure you submit all required documents to avoid an RFE or denial.For instance, failing to include your degree certificate when applying for an H1B visa can result in a denial.
3. Insufficient Proof of Financial Support
For an F1 visa, you must prove you can support yourself financially during your studies. This includes providing recent bank statements or an affidavit of support. Without adequate financial proof, your application can be denied. If applying for an H1B visa, you must demonstrate that your employer can pay the prevailing wage. This includes submitting a valid Labor Condition Application (LCA). Failure to provide this documentation can result in denial.
4. Weak Ties to Home Country
To change your status to another nonimmigrant visa like F1, H1B, or B1/B2, you must provide strong evidence of your intent to return home. For instance, owning a house or having a job waiting for you back home strengthens your change of status application.
Family ties can also show your intent to return home. Including letters from family members, proof of their residence, and statements about your relationship with them in your application can demonstrate such intent.
5. Lack of Proper Explanation for Change of Status
When applying for change of status, you must provide a clear explanation of your reasons for requesting a new status. The USCIS needs to understand your educational, professional, or personal goals. For instance, if changing from H1B to F1, your application should explain how studying will benefit your career. This clarity supports your application and demonstrates genuine intent.
6. Failure to Adequately Respond to an RFE
If the errors or missing information in your change of status application are minor, the USCIS will likely issue an RFE rather than deny your application outright. An RFE asks for additional information or documentation before your case is adjudicated.
If you do not respond properly or on time, your application could be denied.
What If Your Change of Status Is Denied?
If your change of status is denied, first review the denial notice carefully. The notice will explain why your request was not approved, such as missing documents, not meeting eligibility requirements, or filing errors. Understanding the reasons helps you know what went wrong and what to do next.
If you think the denial was a mistake, you might be able to appeal the decision. Typically, you have 30 days from the date of the denial notice to file an appeal or a motion to reopen or reconsider. To do this, you need to submit Form I-290B, Notice of Appeal or Motion, along with the required fee and supporting documents. An immigration attorney can help you with this process to ensure your appeal is well-prepared.
If you can't resolve the denial, you must leave the country by the expiration of your current status. Overstaying your visa can lead to serious consequences, such as being barred from returning to the United States for three to ten years, depending on the length of your overstay. Additionally, you could face deportation and have difficulty obtaining future visas. Make travel plans early to ensure you leave the country on time and avoid future problems.
What is Consular Processing?
Consular processing is when you apply for a nonimmigrant visa to enter the United States for a specific purpose, such as working, studying, or tourism. You need to visit a U.S. embassy or consulate in your home country. There, you will fill out forms, provide documents, and attend an interview to prove your reason for visiting.
During your interview, a consular officer will ask questions to ensure you meet the requirements for the visa you want. They will check your documents, like your passport, application forms, and sometimes proof of financial support or a letter from your school or employer.
If everything goes well, the consular officer will approve your visa, and you will get it stamped in your passport. You can then use this visa to travel to the United States for its intended purpose.
The Consular Processing Application Process
If you have to return to your home country because your change of status application was denied, you can reapply for a nonimmigrant visa through consular processing. The following guide will take you through each step of the process, ensuring you understand what to do and how to do it.
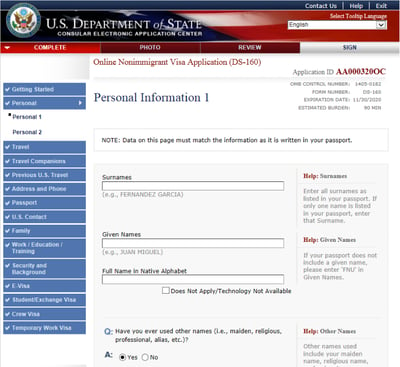
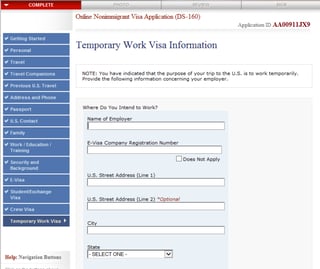
Step 1: Complete the Online Visa Application (DS-160)
To start, go to the Consular Electronic Application Center (CEAC) to access the DS-160 form. Here’s how to fill it out:
Personal Information: Provide your full name, gender, marital status, and date of birth. Ensure that these details match exactly with your passport.

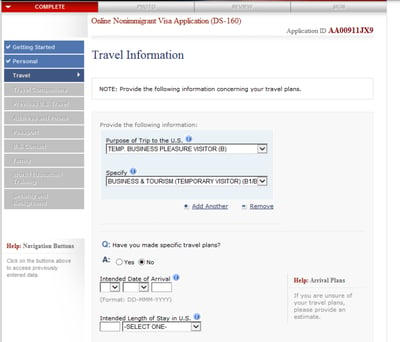
Travel Information:
- F1 Visa (Student): Indicate your purpose of travel as "study" and provide the address of the school you will attend.
- H1B Visa (Work): Indicate your purpose of travel as "temporary work" and provide the address of your employer.
- B1/B2 Visa (Business/Tourist): Indicate your purpose of travel as "tourism" or "business," and provide the addresses where you will be staying or conducting business.
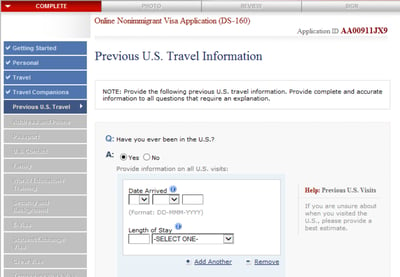
Previous U.S. Travel: List any prior trips to the United States, including dates and visa types.
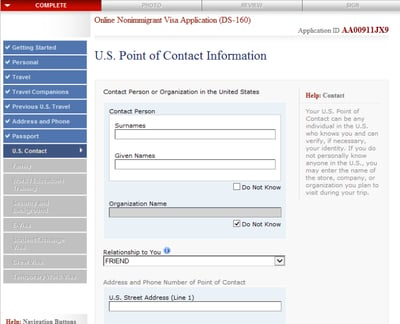
U.S. Contact: Provide details of a contact person in the United States, such as:
- F1 Visa: Your school’s international student office.
- H1B Visa: Your employer.
- B1/B2 Visa: A friend, relative, or business associate, if applicable.
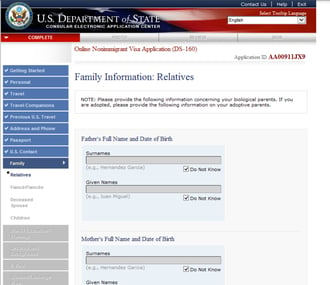
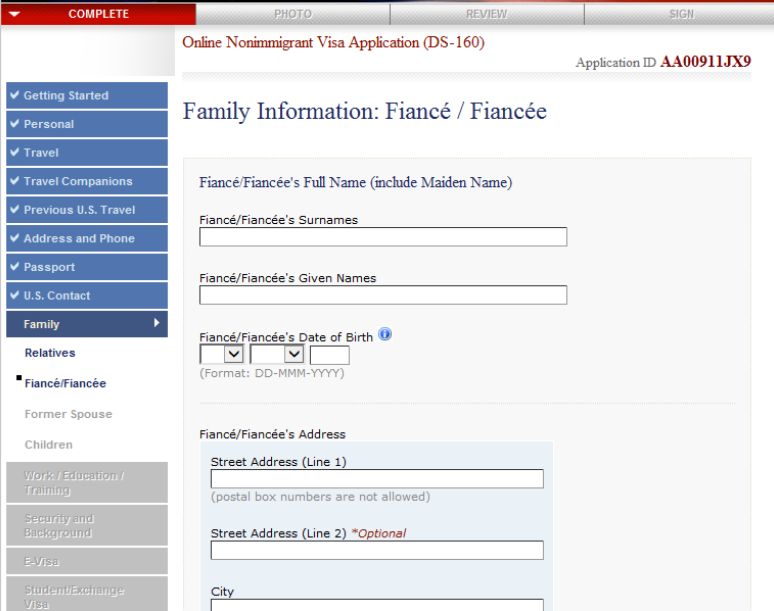
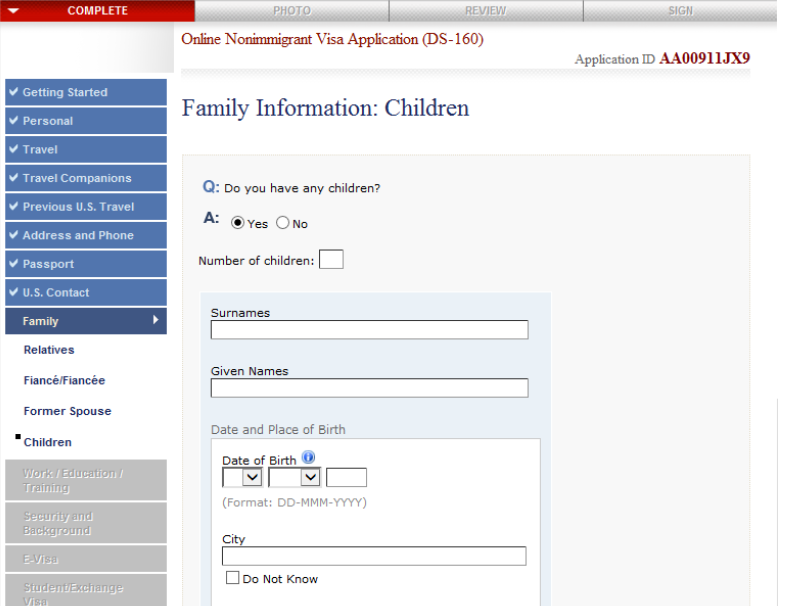
Family Information: Enter the names, dates of birth, and addresses of your family members, including your spouse or fiance/fiancee.
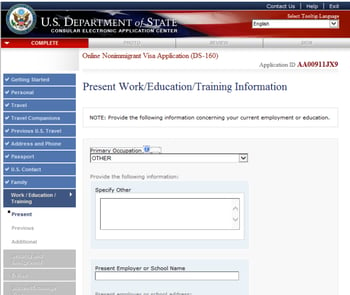
Work/Education/Training:
- F1 Visa: Detail your educational background, including schools attended.
- H1B Visa: Detail your education and employment history and any specialized training.
- B1/B2 Visa: Provide your current employment information or indicate if you are retired.

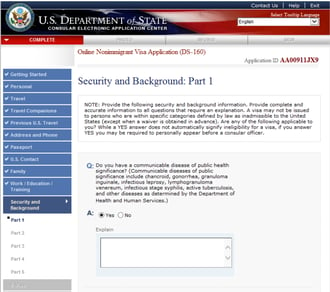
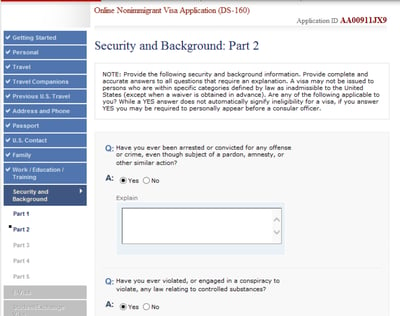
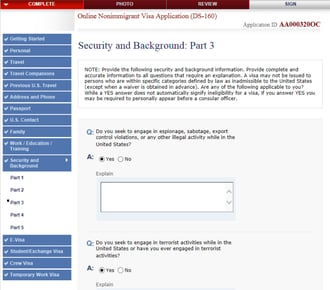
Security and Background: Answer all questions about your health, criminal history, and involvement in various activities honestly.
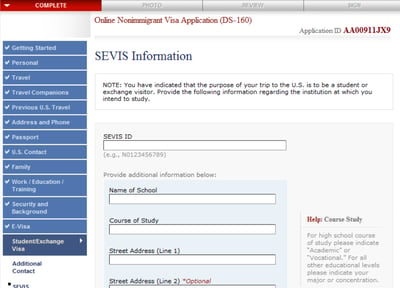
Depending on the type of visa you are applying for, you will need to provide specific information related to that visa. For example, if you’re applying for an F1 student visa, you will need to fill out related to your school and Student and Exchange Visitor Information System (SEVIS) ID.
If you are applying for a temporary work visa, such as an H1B, you’ll need to provide specific information about your U.S. employer.
Step 2: Pay the Visa Application Fee
The visa application fee varies depending on the type of visa you are applying for:
- F1 Visa: Approximately $185.
- H1B Visa: Approximately $205.
- B1/B2 Visa: Approximately $185.
Payment methods include online payment or paying at a designated bank or payment center. Keep the receipt as proof of payment, as you will need to present this during your interview.
Step 3: Schedule Your Visa Interview
Locate the nearest U.S. embassy or consulate in your home country. Visit their website to schedule your visa interview. You will need the DS-160 confirmation number and the visa application fee receipt for this step. After scheduling, you will receive a confirmation of your appointment date and time.
Step 4: Gather Required Documents
Before your interview, prepare all necessary documents:
- Passport: Must be valid for at least six months beyond your intended stay.
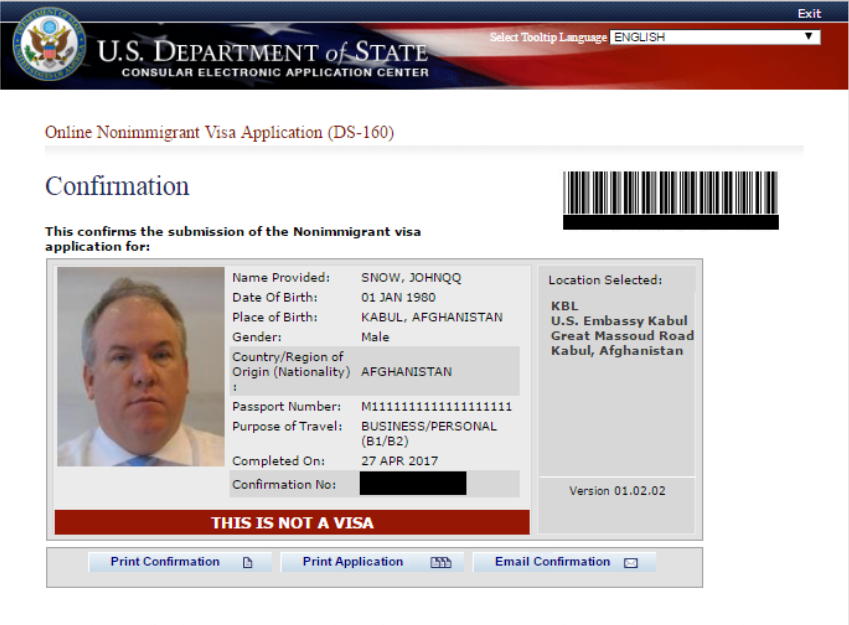
- DS-160 Confirmation Page: Print the page with the barcode.
- Visa Fee Receipt: Proof that you have paid the application fee.
- Photo: A printed photo that meets the U.S. visa photo requirements.
- Supporting Documents: Depending on your visa type, you might need:
- F1 Visa:
- I-20 Form: Issued by your school.
- Proof of Financial Support: Bank statements, sponsor letters, or scholarship letters.
- Academic Transcripts: Certificates and records from previous schools.
- H1B Visa:
- Employment Contract: Job offer letter or contract from your employer.
- Educational Certificates: Degrees and certifications.
- B1/B2 Visa:
- Proof of Financial Support: Bank statements or financial documents.
- Ties to Your Home Country: Documents proving you have strong ties to your home country, such as a job, property, or family.
- Purpose of Travel: Invitation letters, travel itineraries, or business meeting schedules.
Step 5: Attend Your Visa Interview
On the day of your interview, arrive at the embassy or consulate at least 15 minutes early. Dress professionally and bring all your documents. During the interview, answer all questions honestly and clearly. Be prepared to discuss your travel plans, background, and ties to your home country.
- F1 Visa: Be ready to explain why you chose your specific school and program, and how you will finance your education.
- H1B Visa: Be prepared to discuss your job role, qualifications, and the duration of your employment.
- B1/B2 Visa: Be prepared to discuss your travel plans, duration of stay, and how you will support yourself during your visit.
Step 6: Wait for Visa Processing
After your interview, the consular officer will inform you of the next steps. Visa processing times vary, so check the U.S. embassy or consulate website for estimated wait times. If additional information or documents are requested, provide them promptly.
Step 7: Receive Your Visa
Once your visa is approved, your passport with the visa will be returned to you, either by mail or for pickup at the embassy/consulate. Carefully check the visa for any errors. If you find any mistakes, contact the embassy or consulate immediately to correct them.
Step 8: Prepare for Your Trip
With your visa in hand, make your travel arrangements. Book your flight and familiarize yourself with U.S. customs and immigration procedures. Pack all your important documents, including your passport with the visa, DS-160 confirmation page, and any other required documents.
Step 9: Arrive in the United States
When you arrive in the United States, present your passport, visa, and any additional documents to the immigration officer at the port of entry. Answer any questions about your trip and stay in the United States honestly and clearly.
By following these steps, you can successfully apply for a nonimmigrant visa and prepare for your trip to the United States.
Consular Processing in a Third Country
You can apply for a nonimmigrant visa at any U.S. embassy or consulate, not just in your home country. Getting a visa from a third country is more challenging, but with the right preparation and documentation, success is still possible.
A valid reason helps when applying for a U.S. travel visa from a third country. Denial rates are often higher for third-country applicants, as consular officers tend to closely scrutinize these applications. Therefore, you should be prepared to clearly explain why you are applying from a third country.
Please note that some view applying from a third country as "consulate shopping," choosing a location with faster processing times, and consular officers might suspect you are avoiding your home country’s embassy for such reasons. They could question your intentions and scrutinize your application more thoroughly.
Logistical issues can also arise when applying from a third country. Embassy staff might not speak your language or understand your home country’s conditions. This can result in longer processing times if they need to consult with the U.S. embassy in your home country.
Each U.S. embassy and consulate has different procedures, processing times, and appointment availability. Before applying, contact the embassy or consulate to ensure they accept third-country applications. Learn about their specific processes and expected wait times to prepare better.
As previously noted, one major requirement for a nonimmigrant visa involves proving you have strong ties to your home country and plan to return after your stay in the United States. As such, you should generally apply from the country where you have the strongest social and economic ties. If you stay temporarily in a third country, officers in that country might suggest applying from your home country instead.
Six Tips to Help You Prepare for Your Visa Interviews
1. Understand the Purpose
At your visa interview, you'll discuss your travel plans with a consular officer. Be ready to clearly explain your reasons for visiting the U.S.
2. Prove Ties to Your Home Country
You must show strong ties to your home country, such as a job, family, or property. Bring documents to support this.
3. Answer Specific Visa Questions
For an H1B visa, be prepared to discuss your job and employer. For an F1 visa, explain why you want to study in the U.S. and how it relates to your career at home.
4. English Language Interview
Expect the interview to be in English. Practice speaking English to improve your fluency and confidence.
5. Make a Good First Impression
First impressions matter. Dress neatly, be polite, and keep your answers brief and clear.
6. State Your Main Purpose Clearly
For F1 visas, your main purpose should be to study. For H1B and B visas, clearly explain your visit's purpose and ensure your answers align with your application.
7. Be Honest and Prepared
Always answer questions truthfully and be familiar with your application and documents. Bring all necessary documents and be ready to provide additional information if needed.
Frequently Asked Questions
Have Question? We are here to help
What are the typical wait times for consular processing?
Wait times for consular processing can vary by location and visa type. It generally includes the time to schedule an interview, administrative processing if required, and issuance of the visa. Checking the U.S. Department of State's visa wait times for your specific consulate is recommended.
What is administrative processing, and how long does it take?
Administrative processing refers to additional review and verification by the consulate after the visa interview. This can take several weeks or months, depending on the complexity of the case and the information required.
Can I expedite my consular processing appointment?
In certain situations, such as medical emergencies, urgent business needs, or humanitarian reasons, you may request an expedited consular processing appointment. You must provide supporting documentation to justify the need for expedited processing.
What should I do if my visa is denied during consular processing?
If your visa is denied during consular processing, the consular officer will provide a reason for the denial, often related to eligibility requirements or insufficient documentation. You may address these issues and reapply, or appeal the decision if you believe there was a mistake.
Can I apply for a different visa type if my initial visa application is denied during consular processing?
Yes, if your initial visa application is denied, you can apply for a different visa type. However, you must meet the eligibility criteria for the new visa category and provide all required documentation for that application.
How can I track the status of my visa application during consular processing?
You can track the status of your visa application on the CEAC website using your DS-160 application number. Additionally, the U.S. consulate handling your case may provide status updates via email.
What should I do if my circumstances change while waiting for my consular processing interview?
If your circumstances change while waiting for your consular processing interview (such as change of address, marital status, or employment), notify the U.S. consulate immediately. Providing updated and accurate information is important for avoiding potential issues during your interview.